 Video on Patreon
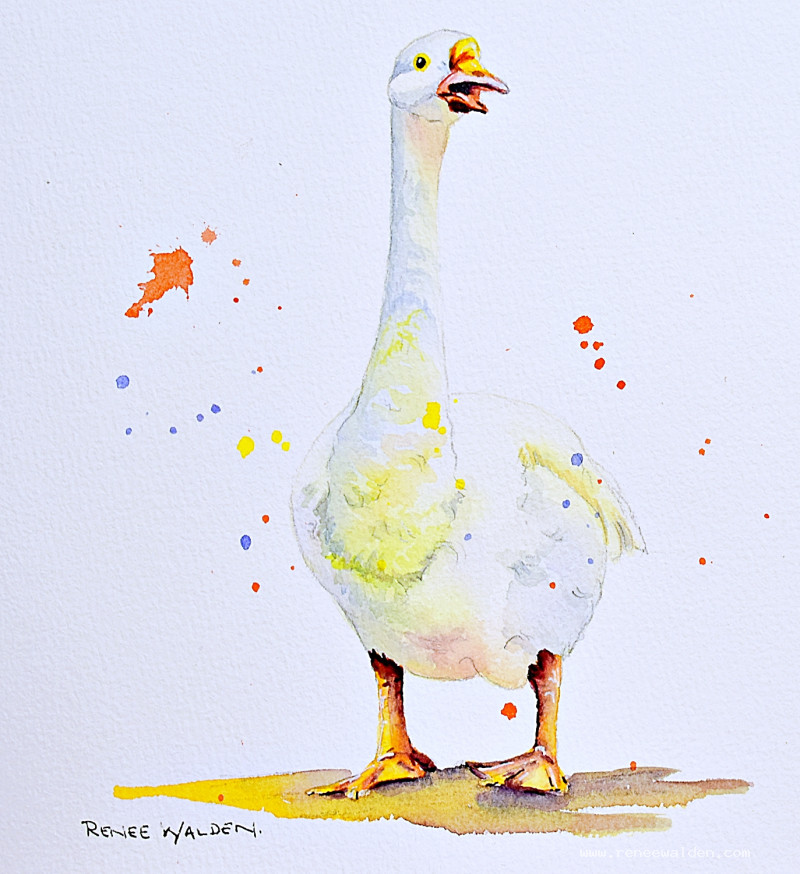
White goose
13 August 2026
Video - Level ◆◆◆
In this lesson we're focusing on how to paint white subjects in watercolour, using this goose as our subject - isn't he just full of character?!
One of the key things to understand about watercolour is that we rarely use white paint — instead, we reserve the white of the paper itself (that becomes our white) and build the form through shadows. But those shadows don't have to be a dull grey. Because surrounding colours reflect onto white surfaces, the shadow areas are often surprisingly colourful and varied.
That's what makes white objects such a rewarding challenge: deciding where to leave the paper untouched, using negative painting to define the white shapes, and then exploring all the colour that lives within the shadows.
I hope you enjoy this one :-)
Thanks to Amit Talwar on Unsplash for the reference photo.
Video run-through...
About This Painting
A white goose — and really a lesson in how to paint white subjects. The secret is that white is never just white: look closely and you'll find blue, green, yellow, orange, and violet all living in the shadows and reflected light. Exaggerating those colours slightly is what makes the painting sing. The dark beak and feet do a lot of work too — they're what makes the white body read as white.
A traceable drawing is available in the lesson description.
The Pencil Drawing
A good drawing matters here because the washes are soft and the pencil structure carries a lot of the detail. Start lightly, correct as you go (the neck especially can end up too thin), then go over it with a darker pencil for photography. Before painting, lighten the whole drawing with a kneadable eraser — particularly in the body area where everything is pale. Keep the lines slightly darker around the beak and feet, where you'll need them as guides.
Reading the Colours in White
Before mixing anything, zoom into the reference photo and identify all the colours in the shadows:
- Blue — above, from reflected sky and water
- Yellow-green — around the mid-body
- Warm orange-yellow — on the belly, from ground and leg reflection
- Brownish orange — underneath, in deep shadow areas
- A touch of violet — scattered through the feather shadows
Mix each of these very pale — they should look almost too light. All the colours need to stay pastel; the contrast will come later from the dark beak, feet, and deeper feather markings.
First Wash: Wet-into-Wet
Wet the entire white area of the goose — including over the beak and feet, which will be repainted anyway. Check from the side for dry patches. Once the paper has a good even sheen, drop in the colours with a medium-small brush, working across the body:
- Blue around the top of the head and back
- Gray-blue under the chin and throat
- Yellow-green at the mid-body
- Warm orange-yellow on the belly and lower body
- A touch of orange near the beak
Let the colours bleed softly into each other. Don't fuss — the wet paper does the blending. Let dry naturally, then finish with a hair dryer.
Second Pass: Soft Shadow Details
Working wet-on-dry now, so there's no rush. With a medium-small brush, begin building the feather shadows — the ruffles, folds, and the bulgy cheek. Key things to think about:
- Some edges are hard (a crisp feather edge), some soft (a rounded form curving away)
- Vary the colour — still blues, greens, oranges — rather than defaulting to gray
- Add marks, then immediately soften some with a clean dry brush
- Work lightly; there will be another pass
Focus on the face area — the fold that creates the cheek, a mark beneath it, the area around the eye. This is where the viewer looks first.
Let dry and repeat as needed. It's better to build up slowly than to go too dark too quickly and lose the luminosity.
Third Pass: Darkest Darks
Now deepen the darkest shadow areas: under the belly, separating tail feathers from body, around the eye, and in the deepest feather ruffles. Mix a darker version of the shadow colours — green gold with cobalt blue works well for the underside; orange with a touch of blue for the brownish shadows below. A very small brush is useful around the face.
Stand back and check tonal values before finishing this step. Hold off on final judgment until the beak and feet are in, as the contrast they add changes how the body reads.
Beak
Mix several colours: Hansa yellow medium (bright yellow-green), Hansa yellow deep (deeper warm yellow), pyrrole orange, and quinacridone rose (pale pink for inside the mouth). Working wet-into-wet:
- Bright yellow along the top ridge
- Deeper yellow blending into it
- Pale pink inside the mouth
- Orange around the lower edges and sides
While still wet, lift highlights with a clean damp flat brush. The beak is the focal point — take time here.
Feet
Cover each foot in Hansa yellow deep. While wet, drop in pyrrole orange in the shadow areas and a touch of quinacridone rose to deepen. Lift highlights immediately — the shininess is what makes them look like real skin. Paint the toenails last with a dirty yellow — they're not pure white.
Ground Shadow
Mix a warm brown from orange and cobalt blue (add a touch of pink if needed). Lay a simple shadow under the feet and along the ground — nothing complex, just enough to anchor the goose. Use the same colours already on the palette to keep harmony.
Deepening Shadows: Final Feathers and Feet
Once everything is dry, revisit the darkest areas. Deepen the shadow under the body, the fold lines in the feet, and any feather details that need more definition. Check that the tonal contrast between body and legs reads correctly.
Splattering
Before pen work, add a small amount of splatter with orange and yellow — just a few marks to loosen the painting and give it energy. A touch of blue splatter as well. Keep it minimal.
Pen and White Gel Pen
Use dark brown ink very sparingly — the washes are soft and lovely and heavy pen work will flatten them. Limit it to: the eye, the inside of the mouth, and a few lines around the feet. Nothing on the feathers.
Before inking, lightly erase pencil lines along some edges of the body where a lost edge would look better than a defined one — the goose blurring softly into the background in places feels more alive than a hard outline everywhere.
A white gel pen picks up highlights on the beak, a dot in the eye, and any areas where the wash got too heavy.
Resources...
* Reference photo
* Drawing to trace
Join me on Patreon
Join my Adventures in Colour Tier for $16 to access this post and my full library of over 200 others including deep-dive videos and step-by-steps.